StencilJs 学习之生命周期
组件有许多生命周期方法,可用于了解组件何时“将”和“执行”加载、更新和呈现。可以将这些方法添加到组件中,以便在正确的时间挂接到操作中。
在组件类中实现以下方法之一,Stencil 将以正确的顺序自动调用它们:
单组件的生命周期
tsx
import { Component, Host, h, Prop, Watch } from "@stencil/core";
@Component({
tag: "web-text",
styleUrl: "web-text.css",
shadow: true,
})
export class WebText {
@Prop() text: string;
@Watch("text")
handlerTextWatcher(val: string, oldVal: string) {
console.log("新值:", val, ",旧值:", oldVal);
console.log("生命周期:watch");
}
connectedCallback() {
console.log("生命周期:connectedCallback");
}
componentWillLoad() {
console.log("生命周期:componentWillLoad");
}
componentWillRender() {
console.log("生命周期:componentWillRender");
}
render() {
console.log("生命周期:render");
return <Host>{this.text}</Host>;
}
componentDidRender() {
console.log("生命周期:componentDidRender");
}
componentDidLoad() {
console.log("生命周期:componentDidLoad");
}
componentShouldUpdate() {
console.log("生命周期:componentShouldUpdate");
}
componentWillUpdate() {
console.log("生命周期:componentWillUpdate");
}
componentDidUpdate() {
console.log("生命周期:componentDidUpdate");
}
disconnectedCallback() {
console.log("生命周期:disconnectedCallback");
}
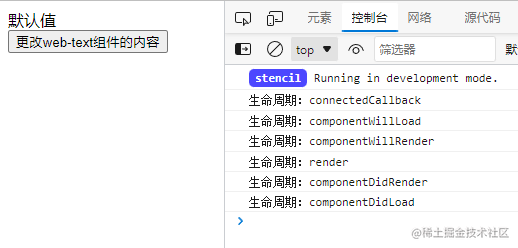
}未更改 Prop text 时 console 输入的结果
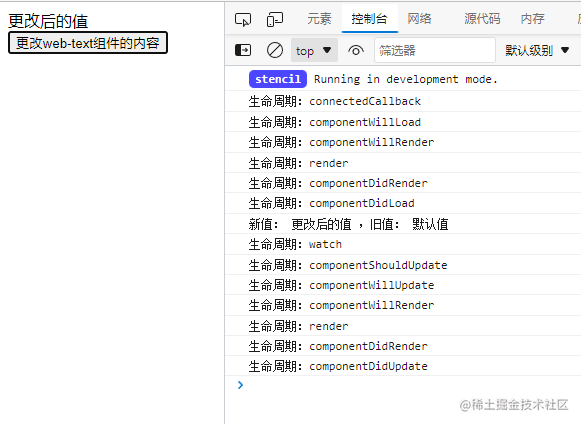
更改 Prop text 后 console 输出的结果
具体的生命图示如下(源自官方网站)
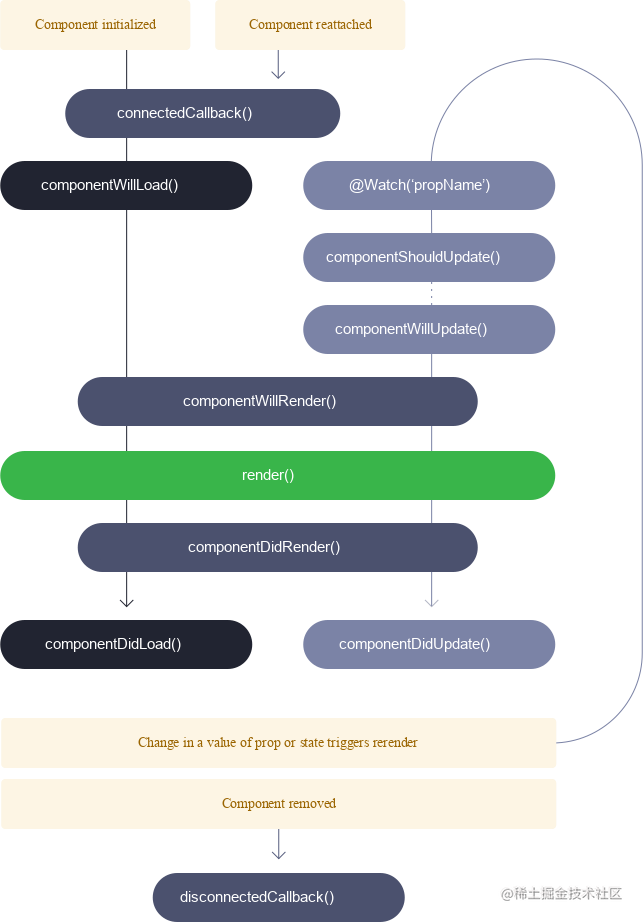
更多生命周期相关的细节请参考官方网站
提示
如果要更改Prop和State的值,建议在 componentWill 开头的生命周期中去更改,因为带 will 的生命周期会在组件渲染前执行,在 did 生命周期内区修改Prop和 State的值,有可能会造成死循环;如果必须在 did 生命周期内区修改Prop和State的值,请一定要做好前置判断
嵌套组件的生命周期
html
<component-a>
    <component-b>
        <component-c></component-c>
    </component-b>
</component-a>component-a-componentWillLoad()component-b-componentWillLoad()component-c-componentWillLoad()component-c-componentDidLoad()component-b-componentDidLoad()component-a-componentDidLoad()
结束语
在上一篇中我们讲解了如何使用stencil-cli 搭建组件库的方式;那么经过本篇的讲解,我们已经了解了其组件的生命周期;下一篇将讲解 StencilJs的相关装饰器。